Tanked
As I mentioned in part 1, I had drawn the conclusion that legs were not what I wanted and that tank treads are probably the most overkill for weight bearing. So , I ordered a Rover 5 base.
Unforeseen requirements
When the Rover base arrived I opened the box to discover something I had completely overlooked; I didn't have a motor controller.
With no clue of what an H-Bridge was and a new found determination I decided to build my own motor controller using about 6 relays. It was finally time to get serious about soldering on those proto-boards.
I used a breadboard to prototype a system that used 6 relays and 4 transistors. You could hear the loud clickity clack of the relays as the direction changed but I was pretty proud of my ingenuity. It was time to solder!
This was the most intricate soldering task I had ever undertaken and it really showed that I'm more of a software kind of guy. I perceived it to be the longest time I have ever spent creating something without testing to see if it still works. You couldn't fire tracer rounds in this department and it took me around 6 hours to finally get it right as I modified the design on the fly. With code you can do things like that ,but in hardware the result of such action is much more time consuming.
When it was all done and the sun had disappeared, I was fatigued but eager to test my piece of hardware. With a long USB cable dangling off my desk I got my rover base to move with a quickly whipped together node script. It worked!! ...with a lot of clicking noise for sure but it actually worked!

Blue smoke
The next day I went about adding the raspberry-pi to the hardware stack to get the project back on track with my goal. In the process attaching the battery to my newly created motor controller... not checking polarity!
Disaster had struck! I heard a pop and finally got to see the blue smoke I had read about on the internet. My transistors all got fried! My on the fly design didn't help either as I had created a huge crows nest at the bottom of the proto-board and had placed the transistors in ridiculously hard to reach places.
It was at that point that I cut my losses and decided to google 'motor controllers' , If only I had done that sooner.
Lessons learned
It seems I had learned the reason for buying third party motors controllers instead of creating your own , but I did learn a lot from the experience:
Point 3 on that list may counter the hardware hacker mentality but for me when I looked at the situation I realised the time it would take to repair my home built motor controller would be better spent on other aspects of the project and that buying a proper pre built one made by professionals was a better choice. At the end of the day I wanted to build a robot , not a motor controller.
I certainly don't regret attempting the task myself though, as I like to think I acquired a valuable life lesson from doing so; You can always do something yourself, but as with everything in life there needs to be a balance and sometimes its better to get things pre-built, pre made or done by someone who actually knows what they are doing.
As I mentioned in part 1, I had drawn the conclusion that legs were not what I wanted and that tank treads are probably the most overkill for weight bearing. So , I ordered a Rover 5 base.
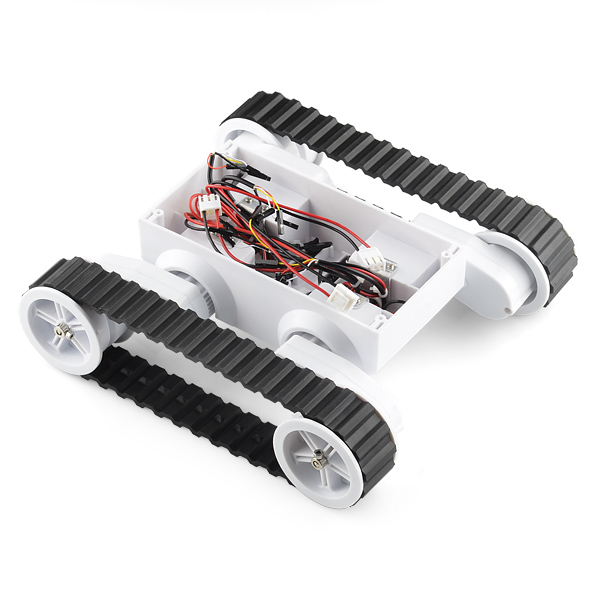 |
| Rover 5 robot base |
Unforeseen requirements
When the Rover base arrived I opened the box to discover something I had completely overlooked; I didn't have a motor controller.
With no clue of what an H-Bridge was and a new found determination I decided to build my own motor controller using about 6 relays. It was finally time to get serious about soldering on those proto-boards.
I used a breadboard to prototype a system that used 6 relays and 4 transistors. You could hear the loud clickity clack of the relays as the direction changed but I was pretty proud of my ingenuity. It was time to solder!
This was the most intricate soldering task I had ever undertaken and it really showed that I'm more of a software kind of guy. I perceived it to be the longest time I have ever spent creating something without testing to see if it still works. You couldn't fire tracer rounds in this department and it took me around 6 hours to finally get it right as I modified the design on the fly. With code you can do things like that ,but in hardware the result of such action is much more time consuming.
When it was all done and the sun had disappeared, I was fatigued but eager to test my piece of hardware. With a long USB cable dangling off my desk I got my rover base to move with a quickly whipped together node script. It worked!! ...with a lot of clicking noise for sure but it actually worked!
Blue smoke
The next day I went about adding the raspberry-pi to the hardware stack to get the project back on track with my goal. In the process attaching the battery to my newly created motor controller... not checking polarity!
Disaster had struck! I heard a pop and finally got to see the blue smoke I had read about on the internet. My transistors all got fried! My on the fly design didn't help either as I had created a huge crows nest at the bottom of the proto-board and had placed the transistors in ridiculously hard to reach places.
It was at that point that I cut my losses and decided to google 'motor controllers' , If only I had done that sooner.
Lessons learned
It seems I had learned the reason for buying third party motors controllers instead of creating your own , but I did learn a lot from the experience:
- Polarity matters!
- Hardware is a whole different ballgame
- Sometimes its better to not do it yourself
Point 3 on that list may counter the hardware hacker mentality but for me when I looked at the situation I realised the time it would take to repair my home built motor controller would be better spent on other aspects of the project and that buying a proper pre built one made by professionals was a better choice. At the end of the day I wanted to build a robot , not a motor controller.
I certainly don't regret attempting the task myself though, as I like to think I acquired a valuable life lesson from doing so; You can always do something yourself, but as with everything in life there needs to be a balance and sometimes its better to get things pre-built, pre made or done by someone who actually knows what they are doing.
Comments
Post a Comment